Unlocking the Nexus bootloader is a key first step for any Android enthusiast looking to fully utilize their device’s capabilities. With this process, Nexus users can dive into the world of custom ROMs and rooting, optimizing their Nexus 6 or Nexus 9 beyond manufacturer settings. Not only does unlocking the bootloader open the door to flashing Nexus ROMs, but it also allows for the installation of custom recovery tools, enhancing your control over the device. However, it’s essential to recognize that this action may void warranties, so understanding the risks is crucial. If you’re ready to tailor your Android experience, unlocking the bootloader is your gateway to endless possibilities and enhancements.
For many users, the journey into advanced Android customization begins with the process of unlocking the bootloader on their devices. Whether you’ve recently purchased a Nexus 6 or Nexus 9, this action is the foundation for taking full advantage of all the phone has to offer. Through this method, you gain the freedom to explore options like flashing custom firmware, gaining root access, and setting up alternative recovery systems. While this endeavor does come with some risks, especially regarding warranty limitations, it ultimately empowers you to transform your device into a personalized powerhouse. If you’re eager to experience the full potential of your Android device, understanding how to perform a bootloader unlock is essential.
Understanding the Nexus Bootloader and Its Importance
The bootloader serves as a critical component of your Nexus device, acting as a bridge between the hardware and the operating system. It essentially tells your device what to do when it powers on and allows the phone to load the operating system. For developers and enthusiasts, unlocking the bootloader is an essential step to gain complete control over the device. With an unlocked bootloader, users can do much more than just use their device as it comes; they can explore a spectrum of possibilities such as flashing custom ROMs and rooting their Nexus devices, making the most of the hardware’s capabilities.
Moreover, understanding the bootloader and its functionalities will empower you to customize your experience significantly. Whether it’s unlocking the Nexus 6 bootloader or the Nexus 9 bootloader, the core idea remains the same. Each phone comes pre-loaded with a locked bootloader to maintain security, but for power users, the ability to flash custom ROMs can lead to enhanced performance, newer features, and improved battery life. However, it is critical to weigh the risks, as unlocking the bootloader can void your warranty and may also lead to data loss.
Steps to Unlock the Nexus Bootloader
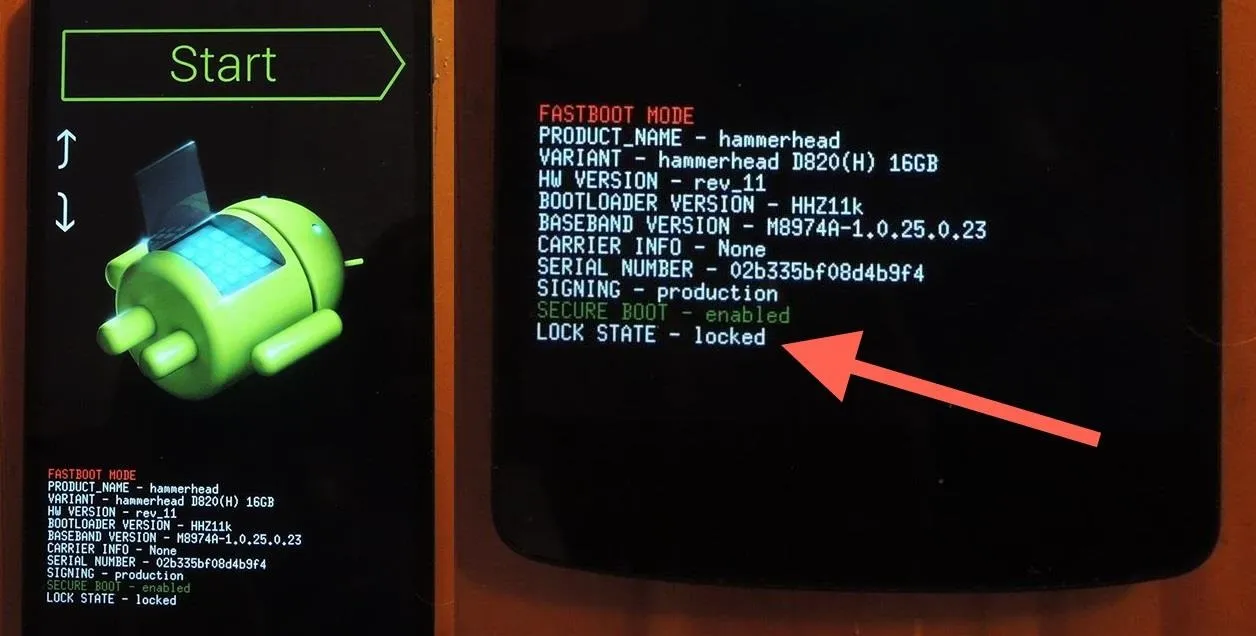
Unlocking the bootloader of your Nexus device, such as the Nexus 6 or the Nexus 9, is a relatively straightforward process. The first step is to prepare your system by setting up the Android SDK, which allows you to utilize adb and fastboot commands necessary for unlocking. Starting by enabling ‘Developer options’ and USB debugging on your device ensures a smooth connection between your phone and computer. Once set up, you can issue the necessary commands to boot your phone into fastboot mode and proceed with the unlock process.
The series of commands that you’ll execute—ranging from ‘adb reboot bootloader’ to ‘fastboot oem unlock’—will guide your device through the unlocking procedure. Each command assumes a connection between your computer and phone, so be sure to authorize access to ensure successful execution. The moment you encounter the bootloader unlock confirmation on your screen, simply select Yes to confirm the unlock. This process typically takes just a minute, and you will know it has completed successfully when you see the unlock icon during boot.
Benefits of Unlocking and Flasing Custom ROMs
Once you unlock the bootloader of your Nexus device, the doors to customization swing wide open. One of the most exciting capabilities is the ability to flash Nexus ROMs that can enhance the device’s performance or bring in new features that are not available in the stock version. Custom ROMs are often built by enthusiasts and developers who aim to improve the user experience, offering users the latest Android versions, added features, and even enhanced battery optimization. Therefore, unlocking the bootloader is a journey towards significantly improving your Android experience.
Additionally, rooting your Nexus device becomes a task made easy once the bootloader is unlocked. With root access, you can install apps that require elevated permissions, improve performance through system tweaks, and create backups of your entire system. However, it’s important to choose a trusted custom recovery like TWRP, as it allows you to manage ROM installations smoothly and restore your device if needed. The freedom and control gained through this process are unparalleled, attracting many users to unlock their devices in pursuit of optimal performance.
Potential Risks of Unlocking the Bootloader
While unlocking the bootloader offers numerous benefits, it is crucial to acknowledge the risks involved. Firstly, as mentioned previously, unlocking your bootloader can void your warranty—this alone is a significant factor that should not be overlooked. If you encounter any issues with your device post-unlocking, the manufacturer may refuse service, leaving you with limited options for support. Moreover, during the unlocking process, there is a risk of bricking your device if the commands are not executed properly. It’s vital to follow the instructions carefully and ensure that you understand each step along the way.
Additionally, with an unlocked bootloader, your device becomes more vulnerable to malicious software and attacks since security features are bypassed. All data on your device will be erased during the process, which means that careful backups must be conducted beforehand to prevent loss. As you approach this venture with your Nexus 6 or Nexus 9, weigh these risks against the benefits and move forward only if you feel confident in the process and your understanding of the implications involved.
Setting Up Your Environment for Bootloader Unlocking
Before embarking on the journey to unlock the bootloader of your Nexus device, it’s essential to set up a proper environment. This begins with downloading the Android SDK, which provides the necessary tools to execute adb and fastboot commands from your computer. Ensure you have the latest version to avoid compatibility issues. After unzipping the SDK, navigate to the Platform-tools folder, as this is where you’ll be running your commands. Familiarize yourself with opening a command prompt in this directory, as it will be instrumental during the unlocking process.
In addition to the SDK setup, make sure that your Nexus device is fully charged to prevent shutdowns during the unlocking process. Preparing your device by enabling ‘Developer options’ and USB debugging will streamline the process, making the connection to your computer seamless. Also, consider disabling any security features such as screen locks temporarily to avoid issues while granting USB debugging permissions.
Preparing Your Nexus Device for Unlocking
Before you can unlock the bootloader of your Nexus phone, a series of preparatory steps must be taken to ensure that the process goes off without a hitch. First, back up your device thoroughly; data loss is inevitable during an unlock, as the device will perform a factory reset. Use native backup tools or third-party applications to secure your contacts, messages, photos, and other significant files. It’s crucial to ensure that you do not lose anything that you cannot recover later.
Once your data is backed up, proceed to modify settings on your device to facilitate the unlocking process. As previously mentioned, enabling ‘USB debugging’ and ‘OEM unlock’ within the Developer options is an essential step. Furthermore, consider ensuring that your Nexus device remains charged—including keeping it plugged in during the process—to prevent interruptions. Preparation sets the foundation for a successful outcome when you finally initiate the commands to unlock your bootloader.
Flash Custom Recovery After Unlocking
Once you have successfully unlocked the bootloader of your Nexus device, the next step many users take is to flash a custom recovery. Custom recoveries like TWRP (Team Win Recovery Project) allow you to install custom ROMs, make full backups of your device, and even restore firmware if something goes wrong. To flash a custom recovery, you simply need to connect your device to your computer and use the appropriate fastboot commands, ensuring you have the recovery image file saved on your computer.
After entering the command to flash the custom recovery, reboot your device into recovery mode to verify whether the installation was successful. This step is pivotal for users looking to fully unlock the potential of their Nexus devices. Not only does it empower you to flash Nexus ROMs, but it also grants access to numerous customization options that are not available in the stock recovery. The ability to utilize a custom recovery expands functionality significantly, allowing users to explore the diverse world of Android customization.
Community and Resources for Nexus Bootloader Unlocking
Tackling the unlocking of your Nexus bootloader can feel daunting, but you don’t have to go at it alone. Numerous communities exist, particularly on platforms like XDA Developers, where fellow Nexus users and developers share their experiences, troubleshooting tips, and customs ROM recommendations. Engaging with these communities can provide new insights and support, making the process smoother and more enjoyable. Whether you’re seeking help for a specific issue or exploring the latest custom ROMs, the collective knowledge of the community is invaluable.
Additionally, there are countless tutorials and resources available online that cater to both beginners and advanced users. From step-by-step guides with screenshots to detailed videos, these resources can enhance your understanding and execution of the unlocking process. Don’t hesitate to utilize forums, video platforms, and even social media groups to expand your knowledge network. The community aspect not only allows for gaining expertise but also fosters a spirit of collaboration and innovation in the world of Android customization.
Frequently Asked Questions
How can I unlock the bootloader of my Nexus 6?
To unlock the bootloader of your Nexus 6, ensure you have the Android SDK installed. Enable Developer Options and USB Debugging on your device. Then, connect your Nexus 6 to your computer and use the command ‘adb reboot bootloader’ to access the bootloader. Finally, type ‘fastboot oem unlock’ to complete the process.
What are the steps to unlock the Nexus 9 bootloader?
Unlocking the Nexus 9 bootloader involves similar steps as the Nexus 6. Download the Android SDK, enable Developer Options and USB Debugging on your Nexus 9. Connect your device to your computer, open a command prompt, type ‘adb reboot bootloader’, then ‘fastboot oem unlock’. Confirm the unlock and your bootloader will be unlocked.
Does unlocking the bootloader on Nexus devices void the warranty?
Yes, unlocking the bootloader on Nexus devices like the Nexus 6 or Nexus 9 will void the warranty. It’s important to be aware of this before proceeding, as it allows for modifications that may not be supported by the manufacturer.
What advantages do I get from unlocking the bootloader on my Nexus device?
Unlocking the bootloader on your Nexus device gives you access to features such as flashing custom ROMs, rooting the device, and installing custom recoveries. This allows for increased customization and control over your device’s operating system.
How do I root Nexus devices after unlocking the bootloader?
After unlocking the bootloader, you can root Nexus devices by flashing a root package via custom recovery or using specific rooting tools. Ensure you have the necessary files and follow the instructions carefully to gain root access.
Is it safe to flash a Nexus ROM after unlocking the bootloader?
Flashing a Nexus ROM after unlocking the bootloader is generally safe, as long as you follow the correct procedures and ensure compatibility. Always back up your data before proceeding with any ROM installation.
Can I install a custom recovery on my Nexus after unlocking the bootloader?
Yes, once you’ve unlocked the bootloader of your Nexus device, you can install a custom recovery like TWRP. This allows for advanced features like Nandroid backups, flashing custom ROMs, and managing system partitions.
Will unlocking the bootloader erase my data on Nexus devices?
Yes, unlocking the bootloader will perform a factory reset on your Nexus devices, resulting in the loss of all data. It’s crucial to back up your important data before starting the unlocking process.
What should I do if I encounter issues while unlocking the bootloader on my Nexus?
If you encounter issues while unlocking the bootloader, ensure that you have the correct drivers installed and that USB Debugging is enabled. Review the commands for any typos and consult forums for specific device troubleshooting.
Can I revert my Nexus device to stock after unlocking the bootloader?
Yes, you can revert your Nexus device to stock after unlocking the bootloader by flashing the factory images provided by Google. This process will restore your device to its original state.
| Step | Action | Notes | |||||||||||||||||||||
|---|---|---|---|---|---|---|---|---|---|---|---|---|---|---|---|---|---|---|---|---|---|---|---|
| 1 | Enable Developer Options by tapping Build number 5-6 times in Settings>About phone. | This allows you to access settings needed for unlocking. | 2 | Check USB Debugging and Enable OEM Unlock in Developer Options. | These options allow your computer to communicate with your device. | 3 | Connect the phone to a computer. | Make sure to grant USB debugging access when prompted. | 4 | Open command prompt in the Android SDK Platform-tools folder. | Make sure the SDK is set up with adb and fastboot commands. | 5 | Type adb reboot bootloader to enter bootloader mode. | Use the correct command according to your OS. | 6 | Once in bootloader mode, type fastboot oem unlock. | Follow on-screen prompts to confirm unlocking. | 7 | Wait for the unlock process to complete. | This usually takes a minute or two. | 8 | Reboot the phone; it will factory reset. | Look for the unlock icon during the boot process to confirm completion. |
| Final Step | Your phone will be set up with an unlocked bootloader. | You can now flash custom ROMs, root it, or install custom recovery. | |||||||||||||||||||||
Summary
Unlocking the Nexus bootloader enables users to fully customize their devices. This process not only allows flashing custom ROMs and rooting your phone but also maximizes control over your Nexus experience. Although it may void your warranty, the advantages of having an unlocked bootloader often outweigh the risks for many enthusiasts. By preparing your device and following the outlined steps carefully, you can unlock your Nexus 6 or Nexus 9 and start enjoying the full potential of your phone.